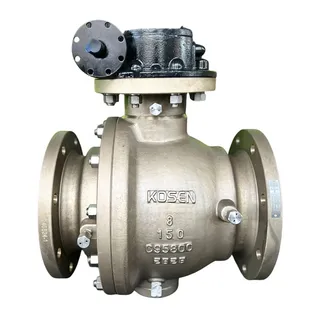
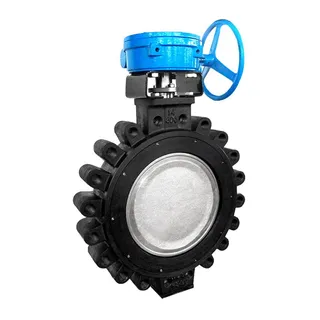
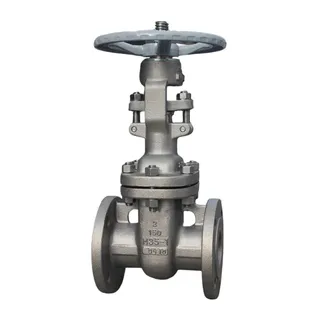
In industrial production, electric ball valves play a crucial role. They not only enable the rapid opening and closing of pipeline systems but also ensure precise control of fluid media. However, to ensure the long-term stable operation of electric ball valves, regular maintenance and proper disassembly and reassembly are essential. This article will provide you with a detailed introduction to the steps involved in disassembling and maintaining electric ball valves, helping you better understand and master this process.
Before disassembling an electric ball valve, adequate preparations must be made to ensure the safety and effectiveness of the operation.
Cut Off Power Supply and Take Safety Measures: Safety is the primary concern. Before starting any operation, the power supply to the electric ball valve must be cut off, and appropriate safety measures should be taken, such as hanging warning signs to prevent accidental power-on. This step is crucial because accidental power-on could lead to serious safety accidents.
Release Pipeline Pressure: Next, the pressure within the pipeline should be released to zero, and any residual media should be drained. This not only ensures the safety of the operation but also prevents media leakage during disassembly, which could cause environmental pollution or personal injury.
Prepare Tools and Materials: Gather the necessary tools, such as wrenches, screwdrivers, vernier calipers, etc., as well as seals, lubricating grease, cleaning agents, and other materials that match the specifications of the ball valve. These tools and materials will help you complete the disassembly and maintenance work smoothly.
Clean the Work Area: Clear away debris and dust around the ball valve to keep the work area clean and tidy. This not only prevents impurities from entering the interior of the ball valve but also provides you with a safer and more efficient working environment.
After completing the preparations, you can begin the disassembly of the electric ball valve. Here are the detailed steps.
Place the Ball Valve in a Half-Open Position: Position the electric ball valve in a half-open state, then flush and remove any hazardous substances that may exist inside and outside the valve body, such as impurities, dirt, or residual chemicals. This step can effectively reduce potential hazards to the operator during disassembly.
Close the Ball Valve and Remove the Flange Connections: Close the electric ball valve, remove the connecting bolts and nuts from both flanges, and then completely remove the valve from the pipeline. Place it on a clean and stable workbench. During disassembly, be sure to protect the flange connection areas to avoid damage.
Sequentially Disassemble the Actuator: Disassemble the actuator in sequence, including the actuating mechanism, connecting bracket, anti-loosening washer, stem nut, butterfly spring, gland, wear-resistant plate, stem packing, etc. During disassembly, be sure to record the installation positions and order of each component to facilitate correct reassembly later.
Remove the Body Cover Connection Bolts: Remove the body cover connection bolts and nuts, separate the valve cover from the valve body, and remove the gasket. During disassembly, operate carefully to avoid damaging the bolts and nuts.
Remove the Ball and Seat: Confirm that the ball is in the "closed" position, remove it from the valve body, and then remove the seat. During removal, protect the surfaces of the ball and seat to avoid scratches or damage.
Remove the Stem and Seals: Gently push the stem down from the valve body center hole until it is completely removed, then remove the O-ring and the lower stem packing. During the operation, be careful to avoid scratching the stem surface and the sealing parts of the valve body stuffing box.
After disassembly, it is necessary to carefully inspect and clean each part.
Inspect for Damage: Carefully inspect the removed parts for wear, cracks, deformation, or other signs of damage. If any damage is found, it should be replaced in a timely manner to ensure the normal operation of the ball valve. At the same time, check the valve body cavity and sealing surfaces for corrosion, scratches, or other issues. If necessary, repair or grind them to ensure sealing performance.
Clean the Parts: Use appropriate cleaning agents or solvents to clean the removed parts, removing grease, dirt, rust, and deposits from the surfaces. After cleaning, dry the parts with a clean cloth or blow them dry to ensure no residue remains on the surfaces. During cleaning, be sure to select cleaning agents that are compatible with the ball valve materials to avoid corrosion or damage to the parts.
After cleaning and inspecting the parts, you can begin the reassembly of the electric ball valve. Here are the detailed steps.
Install New Seals: Install new seals (such as O-rings, seats, etc.) in their respective positions. Ensure that the seals are installed flat, without twists or damage, and fit tightly into the installation grooves. Before installing the seals, apply a thin layer of lubricating grease to their surfaces to facilitate installation and improve sealing performance.
Assemble in the Reverse Order of Disassembly: Assemble the valve in the reverse order of disassembly. First, insert the stem into the valve body center hole, then install the seat, ball, and other components. Next, install the valve cover gasket, connect the valve cover to the valve body, and tighten the body cover connection bolts and nuts. Then, sequentially install the stem packing, wear-resistant plate, gland, butterfly spring, stem nut, anti-loosening washer, connecting bracket, and actuating mechanism.
Tighten the Flange Connection Bolts: Tighten the flange connection bolts and stem nut with the specified torque, ensuring a secure connection. However, do not overtighten to avoid damaging parts or affecting the normal operation of the ball valve.
After reassembly, it is necessary to test and commission the electric ball valve to ensure its good performance.
Perform Pressure Sealing Test: Before reconnecting to the pipeline, conduct a pressure sealing test on the electric ball valve according to relevant standards to check its sealing performance. Apply a certain pressure of fluid to one side of the valve and observe the other side for any leakage.
Check the Opening and Closing Action: After installing the actuating mechanism, connect the power supply and input the corresponding signal to rotate the stem and drive the valve core to the open and closed positions. Check whether the opening and closing action of the ball valve is smooth and accurate, and whether the limit switch is functioning normally.
To extend the service life of the electric ball valve, regular lubrication and maintenance are essential.
Use Suitable Lubricating Grease: The lubricating grease should be compatible with the metal, rubber, plastic components of the ball valve, and the working medium. For example, when the working medium is gas, a lubricant can be used. Apply lubricating grease to the surfaces of the seal installation grooves, rubber seals, and the sealing and friction surfaces of the stem.
Prevent Part Damage: When disassembling and reassembling, be careful to prevent damage to the sealing surfaces of the parts, especially non-metallic parts. When removing O-rings, it is advisable to use special tools. New parts should also be cleaned thoroughly before assembly.
Cleaning and Assembly Precautions: The cleaning agent should be compatible with the rubber, plastic, metal components of the ball valve, and the working medium (such as gas). For example, when the working medium is gas, gasoline can be used to clean metal parts. Non-metallic parts can be cleaned with pure water or alcohol. During assembly, ensure that there are no metal shavings, fibers, grease (except for the specified types), dust, or other impurities, foreign objects, etc., that contaminate, adhere to, or remain on the surfaces of the parts or enter the interior cavity.
Electric ball valves have different requirements in different working environments. When selecting an electric ball valve, it is necessary to choose the appropriate materials and structure based on the actual working environment.
Low-Temperature, Low-Pressure Environment: In low-temperature, low-pressure environments, the material of the ball valve does not require significant adjustment. However, it is still necessary to ensure that the material can adapt to low-temperature conditions to prevent the material from becoming brittle or experiencing a decline in performance at low temperatures.
High-Pressure, High-Temperature Environment: In high-pressure, high-temperature environments, materials that are resistant to high temperatures and pressures, such as stainless steel and alloys, should be selected for the electric ball valve. These materials can withstand high pressure and temperature, ensuring the stable operation of the ball valve in harsh environments.
Selection of Internal Components: The internal components of the electric ball valve should be selected based on the working environment to reduce harm to the valve core and facilitate the flow of the medium, preventing coking and blockage of the electric ball valve. When the electric ball valve is open, some mechanical devices that prevent vibration can be installed to prevent damage to the internal structure of the valve core during operation.
The disassembly and maintenance of electric ball valves is a complex but crucial process. By following the steps outlined above, you can ensure the long-term stable operation of the electric ball valve and extend its service life. Always prioritize safety during the operation and ensure that each step is carried out according to the correct procedure. It is hoped that this article will provide you with valuable guidance and help you better maintain and manage electric ball valves.


